How to | CI/CD with Gitlab
We will create a CI/CD pipeline for a Java Microservice. This service will run in a docker-container.
The pipeline will be triggered when pushing to the git repo. We will define some tasks that will be automatically executed.
- Run Tests with Junit / Maven
- Compile and Pack the application
- Build and push the docker image
You will need to have a properly configured Gitlab instance with a connected gitlab-runner.
Content
- Prepare
- Defining the stages
- Stage: Test
- Stage: Pack
- Stage: Docker
- Conclusion
01 Prepare
I assume you have an application that is ready to be deployed. I’m using my Minimal REST Microservice for this.
Since we want to run tests I’m adding Junit 4 to my maven POM file:
         <dependency>
            <groupId>junit</groupId>
            <artifactId>junit</artifactId>
            <version>4.12</version>
            <scope>test</scope>
        </dependency>
Adding the <scope>test</scope> tells maven to not package this dependency into the final WAR/JAR.
We create a dumb test for our Reply Logic
import com.mentsik.blog.cicd.models.EchoReply;
import org.junit.Test;

import static org.junit.Assert.assertEquals;

public class EchoTest {

    @Test
    public void reply() throws Exception {
        EchoReply reply = new EchoReply("test");
        String expected = "test";
        assertEquals(expected,reply.getReply());
    }

}
We are not going to mess around with embedded application servers. Integration testing will be performed later in the pipeline.
02 Defining the stages
Gitlab expects a file called .gitlab-ci.yml to be present in the root of your repo in order to execute a CI/CD pipeline upon a git push.
First of all we will set some Maven specific cli options. Basically we will set the logging level to WARN and tell maven to download all dependencies into /cache so that dependencies get cached between builds. This way maven doesn’t have to download the dependencies on each stage, which will speed up the process enormously.
> .gitlab-ci.yml
variables:
  MAVEN_OPTS: "-Dorg.slf4j.simpleLogger.log.org.apache.maven.cli.transfer.Slf4jMavenTransferListener=WARN
               -Dorg.slf4j.simpleLogger.showDateTime=true -Djava.awt.headless=true
               -Dorg.slf4j.simpleLogger.defaultLogLevel=WARN
               -Dmaven.repo.local=/cache/maven.repository"
Stage: Test
Our next step is to define our first stage: “test”
> .gitlab-ci.yml
variables:
  MAVEN_OPTS: "-Dorg.slf4j.simpleLogger.log.org.apache.maven.cli.transfer.Slf4jMavenTransferListener=WARN
               -Dorg.slf4j.simpleLogger.showDateTime=true -Djava.awt.headless=true
               -Dorg.slf4j.simpleLogger.defaultLogLevel=WARN
               -Dmaven.repo.local=/cache/maven.repository"

stages:
- test

test:api:
  stage: test
  image: maven:3.3.9-jdk-8-alpine
  script:
  - mvn clean validate compile test -B
This definition tells gitlab that there is one stage, called test. The stage is called test:api which is in turn executed in the stage test. Since we are using a docker gitlab-runner we tell it to use the image maven:3.3.9-jdk-8-alpine which is simply a minimal Linux Alpine image with JDK:8 and Maven 3 installed.
Inside this docker-container, which is created by the Runner, the command mvn clean validate compile test -B is executed. This script is executed after the project has been cloned into the working directory.
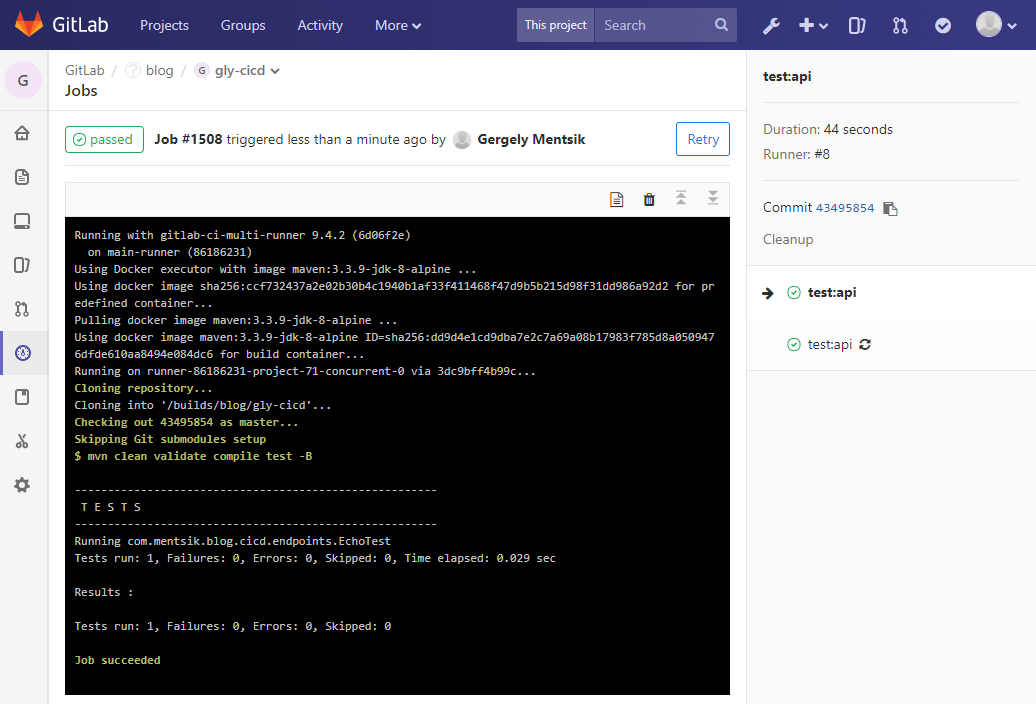
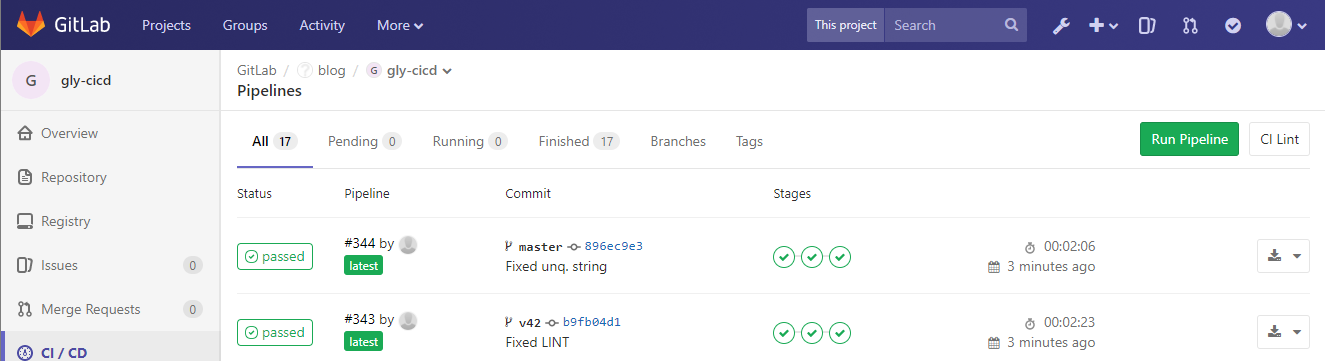
When pushing your project now, the pipeline should be triggered and run the maven stages clean validate compile test
This should look something like this:
Stage: Pack
We want now to pack our application. I like to have all dependencies inside my JAR/WAR. (“fat JAR/WAR”) This makes deploying the application really simple.
I will call this stage pack and it works like this:
pack:api:
  stage: pack
  image: maven:3.3.9-jdk-8-alpine
  script:
  - mvn clean install -B -DskipTests
  artifacts:
    paths:
    - ./target/*.war
We are simply executing mvn clean install as we would locally. Since testing is a seperate stage, we can just skip the tests by passing the flag -DskipTests.
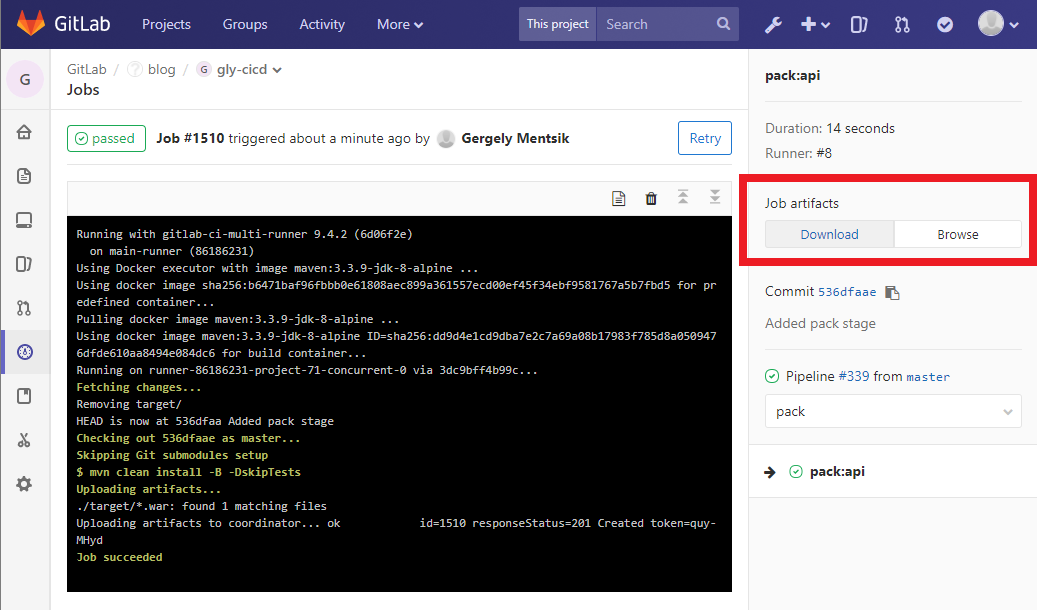
Additionally, we want to be able to download the generated artifact (WAR/JAR). We tell gitlab to look in the folder target/ for any file with the extension .war and to upload it to the server, so we can download it from the UI.
Don’t forget to add the pack stage to the stages list:
stages:
- test
- pack
You can now push again and it should look like this:
Stage: Docker
Now that we have our application ready, we can now create and push the docker-image. For every project this is really the same and looks like:
docker:api:
  stage: docker
  image: docker:latest
  script:
    - docker login -u "$CI_REGISTRY_USER" -p "$CI_REGISTRY_PASSWORD" $CI_REGISTRY
    - docker build --pull -t "$CI_REGISTRY_IMAGE:$CI_COMMIT_REF_SLUG" .
    - docker push "$CI_REGISTRY_IMAGE:$CI_COMMIT_REF_SLUG"
Again, don’t forget to add the stage: docker to the stages list!
This essentially will:
- login with the user who pushed the commit. Those variables are already set! Nothing to do here!
- build the image with the project’s name. Tag it with the COMMIT_REF_SLUG. This is either the slug of the commit OR the branch name. So if you’re pushing to master, the image will be named: project:master.
- push the image!
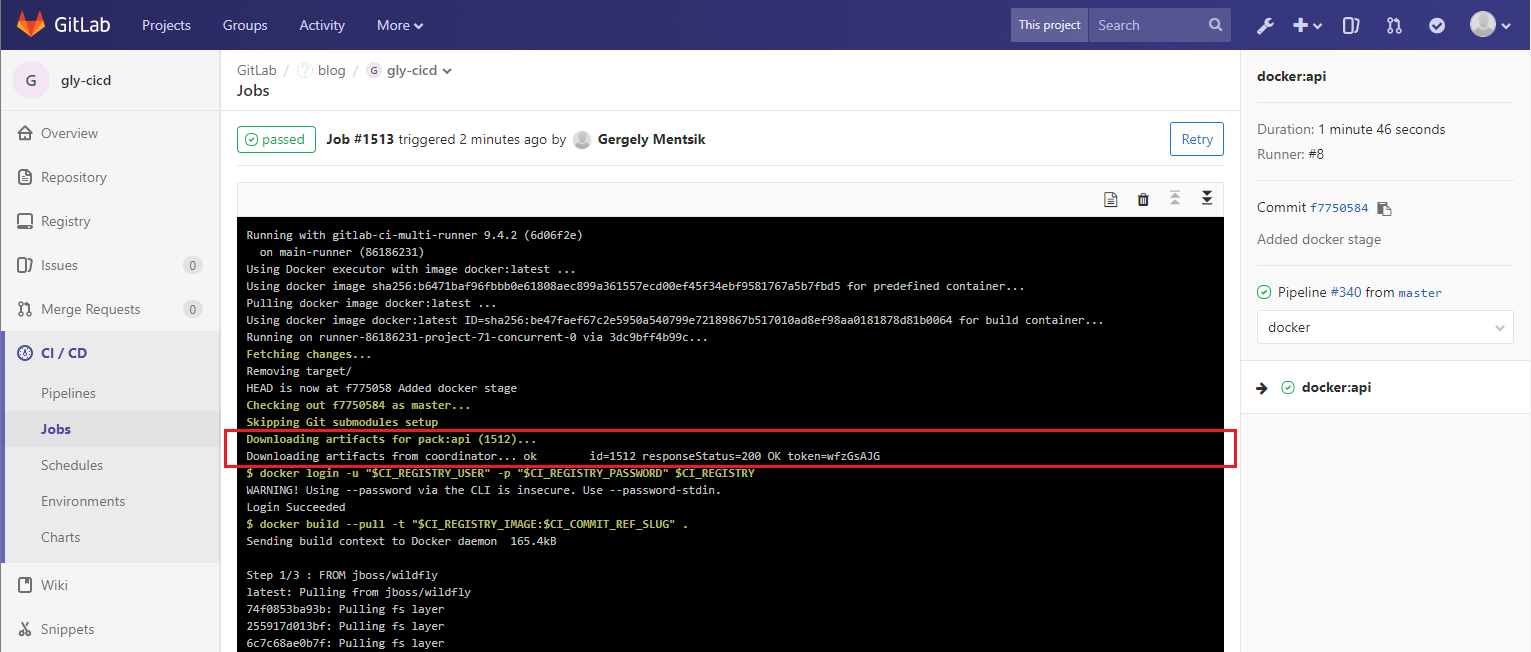
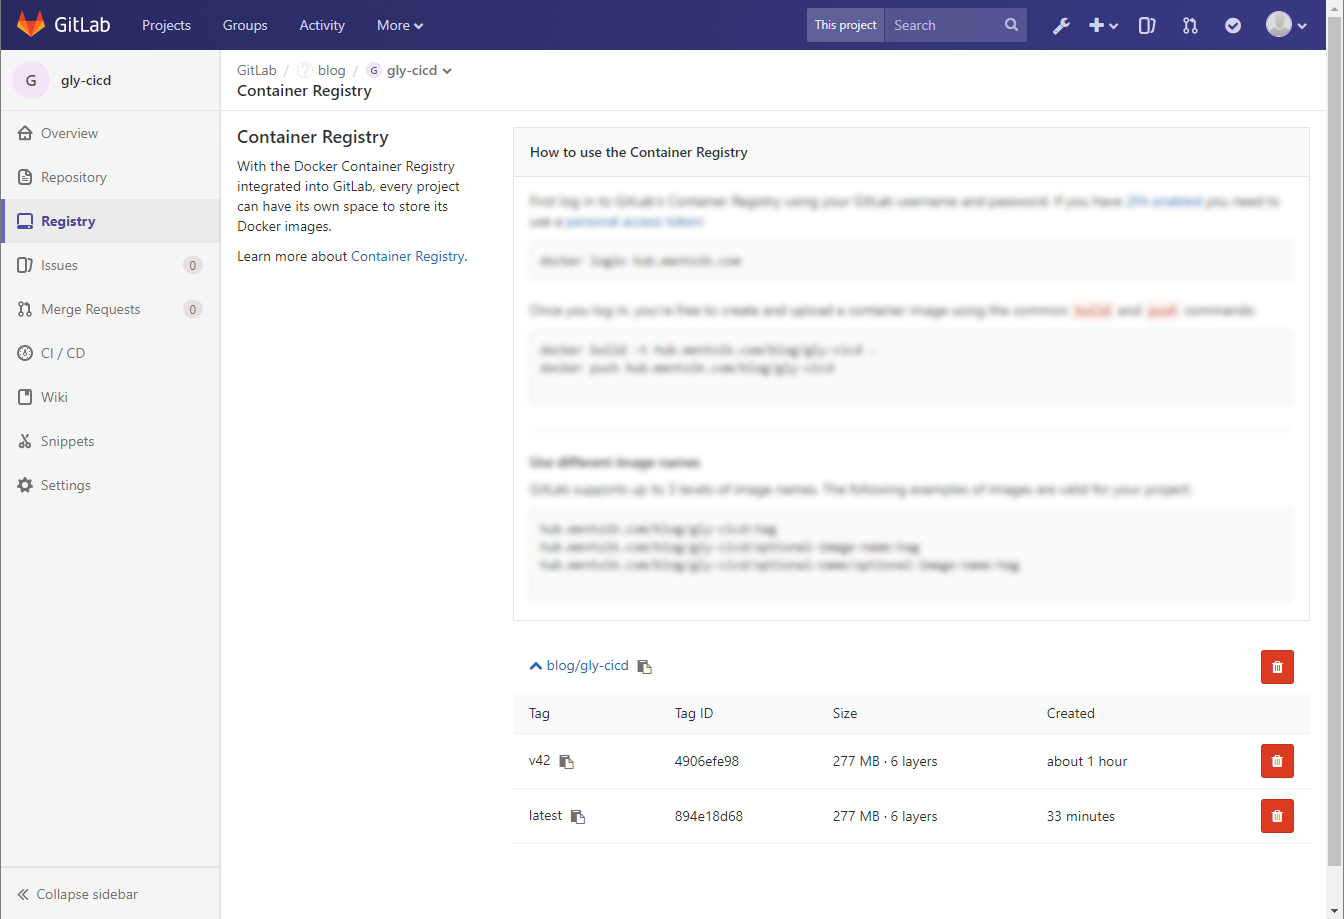
A really nice “side-effect” of the artifact definition above is, that all artifacts will be downloaded for the next builds. We need this because we are adding the api.war into our docker-image as defined in our Dockerfile.
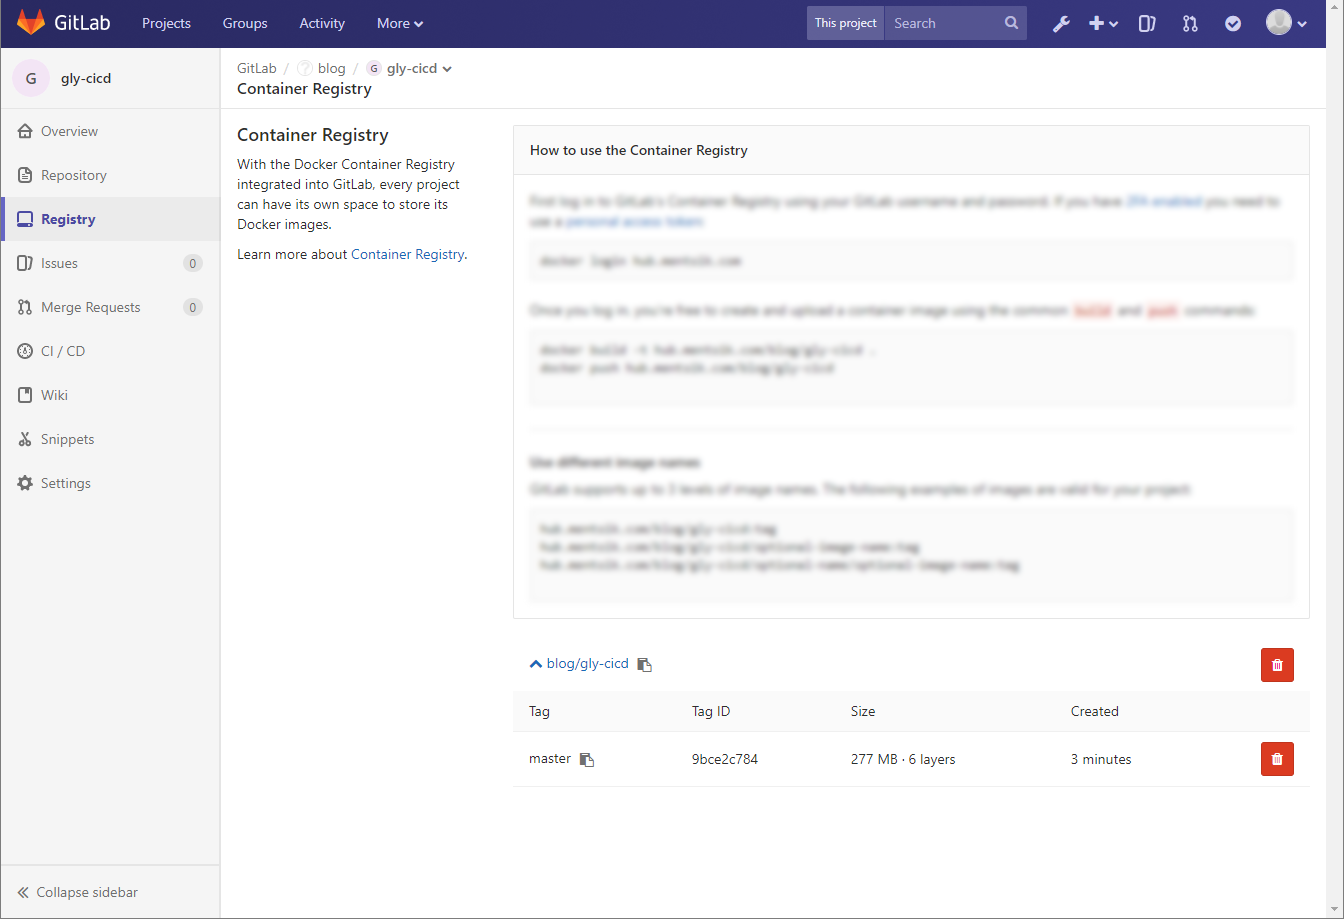
If you now navigate to the registry it should look like this:
If you want to tag the image as :latest if you push to to master, you can do this:
docker:api-master:
  stage: docker
  image: docker:latest
  script:
    - docker login -u "$CI_REGISTRY_USER" -p "$CI_REGISTRY_PASSWORD" $CI_REGISTRY
    - docker build --pull -t "$CI_REGISTRY_IMAGE" .
    - docker push "$CI_REGISTRY_IMAGE"
  only:
  - master

docker:api-tag:
  stage: docker
  image: docker:latest
  script:
    - docker login -u "$CI_REGISTRY_USER" -p "$CI_REGISTRY_PASSWORD" $CI_REGISTRY
    - docker build --pull -t "$CI_REGISTRY_IMAGE:$CI_COMMIT_REF_SLUG" .
    - docker push "$CI_REGISTRY_IMAGE:$CI_COMMIT_REF_SLUG"
  except:
  - master
The job: api-master will be only executed when pushing to master
The jon: api-tag will be executed always, except on master.
Notice that we removed $CI_COMMIT_REF_SLUG for the api-master job. This will tag the image as :latest, making it the “default” image.
For demo purposes I created the branch: v42 and pushed it.
03 Conclusion
This is a very basic pipeline but really effective. The process of setting this pipeline up is really always the same and there is no project-specific definition inside our pipleline specification, making it highly reusable.
I will feature some advanced jobs like integration testing and automated deploment.
What I like most is that the pipeline definition is located inside your project, making the whole process self-documented. Also the steps in the pipeline are essentially the same what we do on our local machine, but automated. This means that developers don’t have to learn something essentially new, but use their everyday workflow. They just have to write it down, which is something most developers hate because we think it is a waste of time. But here we get a big return and benefit from the whole thing, which makes it highly accepted useful.